Windows 8 does not support Virtual PC and probably never will. However, even better is that Windows 8 now includes Hyper-V as a ‘feature’.
You can install this easily by turning it on.
- Just search Settings for the word ‘feature’ and you should find, ‘Turn Features on or off’.
- Then click Hyper-V to include all sub-features.

- You will then need to restart.
- After restart, you will see

on your desktop. Or just type ‘Hyper’ and it will come up in the app search. - Hyper-V works a bit differently from Virtual PC or Virtual Server, so find out about it online.
- However to save you a bit of grief I would suggest that one of the first things you do is setup the networking, otherwise any new machine you create will not be able to be allocated a network connection.
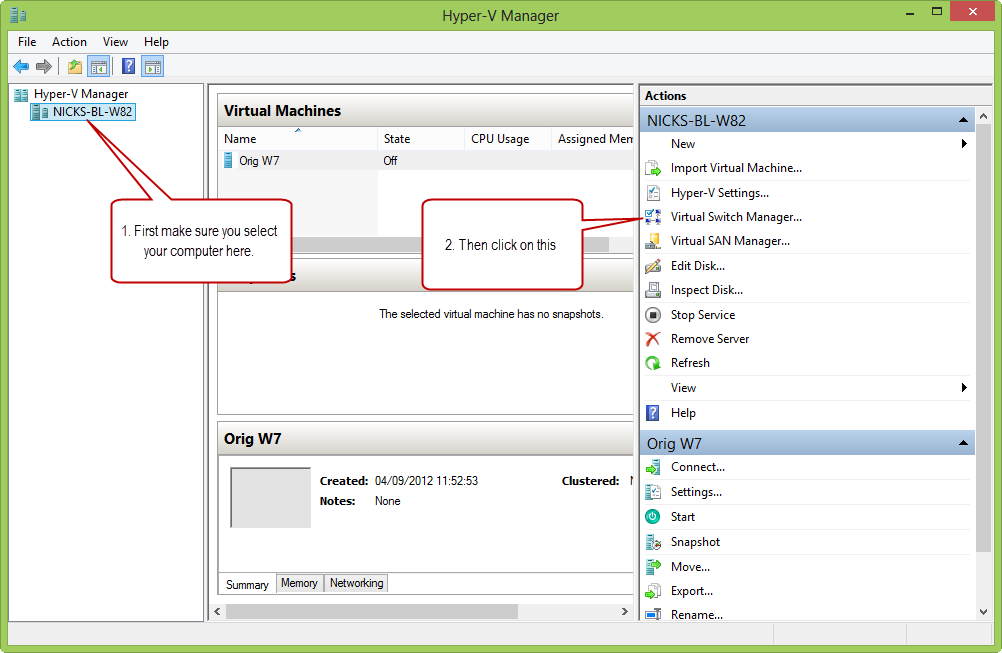
- To set up the network, first ensure you have selected your PC on the left and then click on ‘Virtual Switch Manager’

- You can create a variety of switches that have different access profiles. For your machines to be able to share your network connection and gain access to the internet, you need to create a new ‘external’ switch, by clicking on ‘Create Virtual Switch’, with ‘External’ selected in the list.

- Give the virtual switch a name. You need to select which network device in you host machine you would like the switch to use and how. So I like to put this in the network name. Also if you have more than one network device then you can allocate one to all the guest machines and the other to the host. In the example below, I have decided to use my wired connection and have that shared with the host.

- Now when you create new guest virtual machines, you will be able to select a network for them to join from the start.